Autopsy is a powerful, open-source digital forensic tool widely used by investigators. Designed for ease of use, it aids in analyzing hard drives and smartphones to uncover evidence or recover data. Developed as a user-friendly interface for The Sleuth Kit, Autopsy is the perfect tool for both amateur sleuths and professional investigators.
Key Features of Autopsy
- Image File Analysis: Supports common disk image formats like E01, AFF, and raw/DD.
- Keyword Search: Enables searching for specific keywords in documents, emails, etc.
- File Type Sorting: Organizes and categorizes files automatically.
- Email Analysis: Facilitates examination of email formats like PST and MBOX.
- Web Artifacts Analysis: Examines browsing history, cookies, bookmarks, etc.
- Registry Analysis: For Windows registry examination.
- Timeline Analysis: Visualizes data over time.
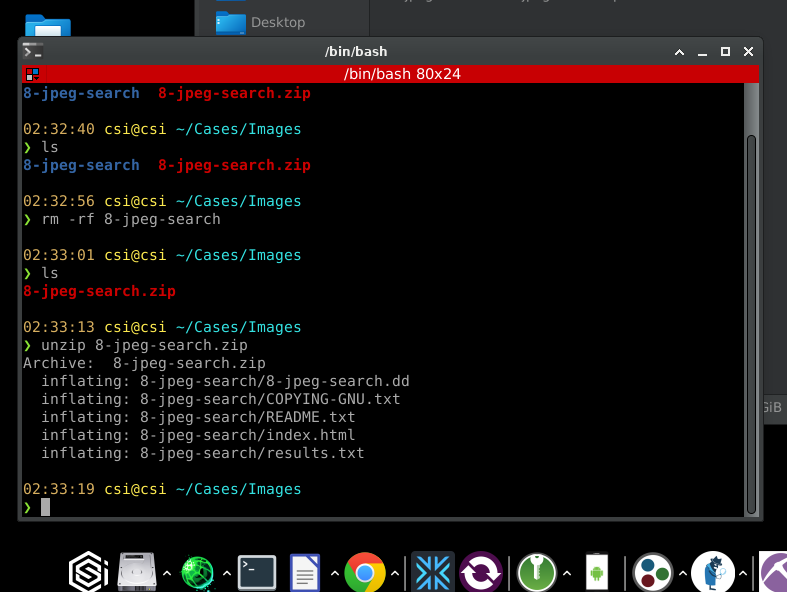
Before we start a new case, we need some sample material to work with. Open your web browser and navigate to https://dftt.sourceforge.net/
Click on 8. JPEG Search Test #1 (Jun '04) and download the image file.
Since we are going to be using CSI Linux, we can navigate to our home directory, and inside the /home/csi/Cases/ directory we can create a directory named Images. Your organization may have another procedure for the proper directory hierarchy, and in that situation, you would follow the protocols provided to you for case management.
Once the .zip file image is downloaded, we can copy the zip file into our Images directory we created earlier and unzip it there.
unzip 8-jpeg-search.zip
Step 1: Creating a New Case
- Open Autopsy and choose "Start New Case."
- Fill in the necessary details (Case Name, Case Number, Investigator Name).
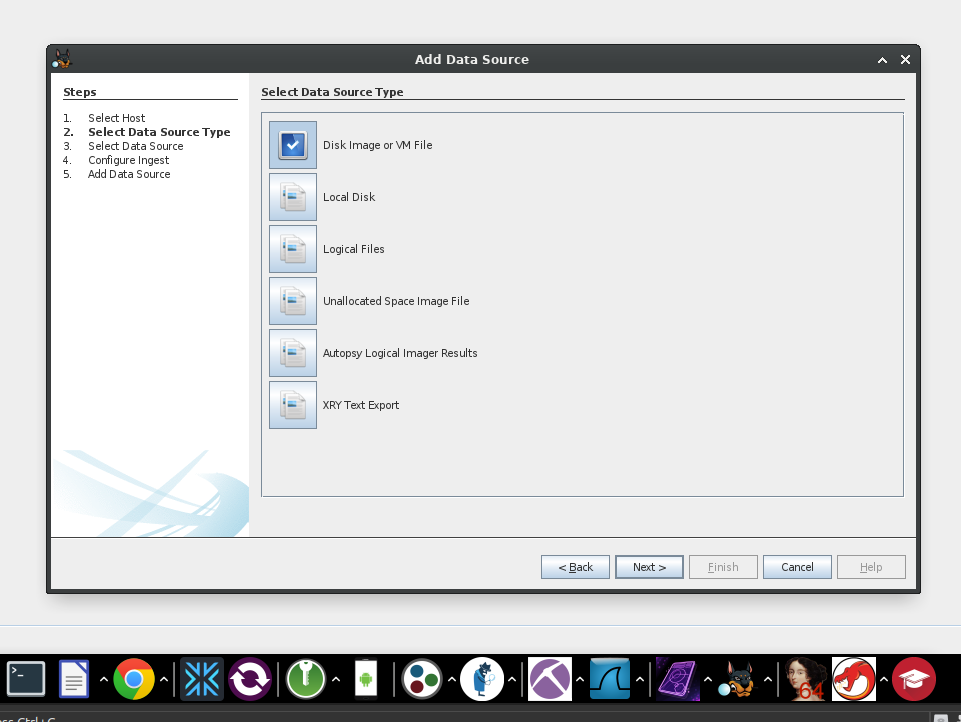
Step 2: Add Data Source
- After opening Autopsy, select Add Data Source.
- Choose 'Generate new host name based on data source'.
- Select the image data source type.
- Pick the image file from /home/csi/Cases/Images/8-jpeg-search/8-jpeg-search.dd.
- Set your timezone, deselect unnecessary analyzers if you're on a non-Windows OS, and proceed.
Feeling like a digital detective yet? Let's move on to adding our data source!
Once the analysis is complete, you can navigate to the Directory Tree and search for the artifacts required for your case. In our example, we're looking for some deleted images, and we found 5 deleted files.
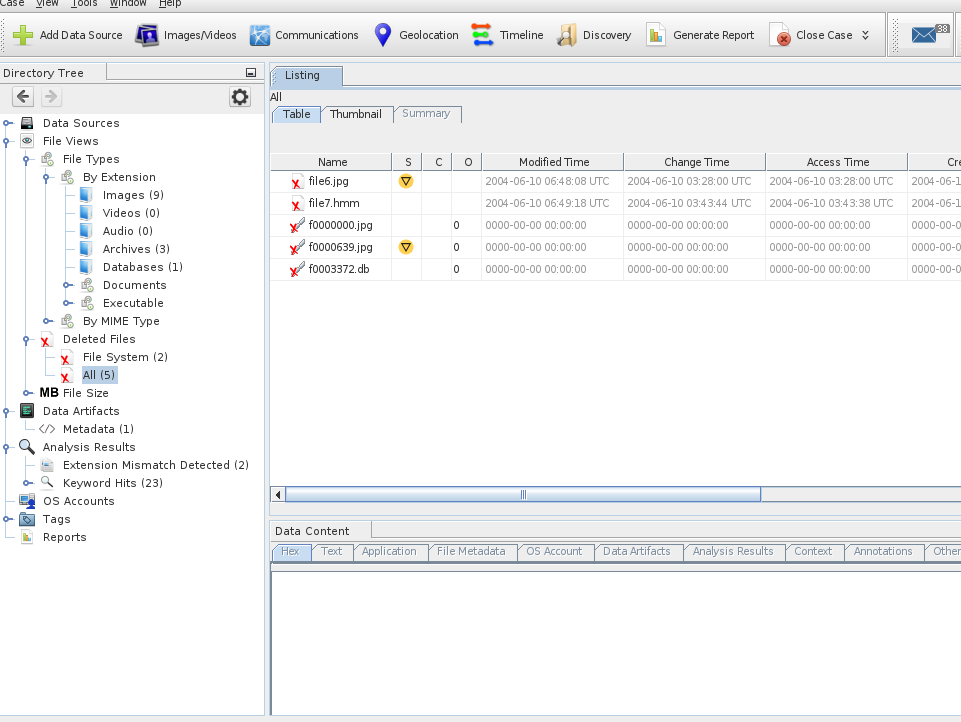
Click on the recovered picture to view it in the Data Content view finder of the application.
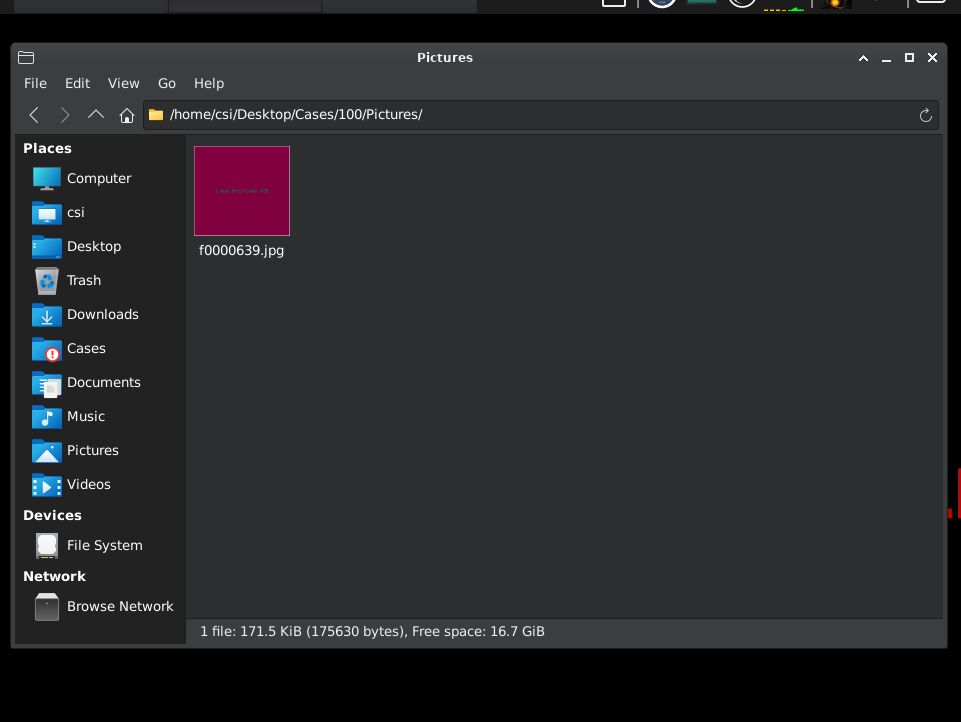
Step 3: Extracting Evidence
After finding the evidence files from our image, we need to extract and save them for our case. Right-click on the recovered file and select Extract File(s). I saved my recovered image to /home/csi/Desktop/Cases/100/Pictures/ to keep our case organized.
Repeat the same process for other deleted files or any relevant information related to your case.
Once we have finished our analysis of the collected image, we can generate our report. Click the generate report button and fill in the required information. Select the export type, then review.
For brevity, you can also click the Data Source in the Directory Tree. Click on your host, and in the listing, when your image is selected under file metadata, you can find all the calculated hashes for the image.
Next, close the case by selecting the Close Case button in the menu.
YouTube
If you would like to watch the video for this post, you can find it on my YouTube channel, Autopsy and CSI Linux
This was just a brief overview of one of the awesome tools included with CSI Linux. Dive deeper into the functionalities of Autopsy, and unleash your inner detective! Thanks for reading.